Unit 5: Irish Music with Harry – Rattlin’ Bog Paper Sculpture
Project Overview:
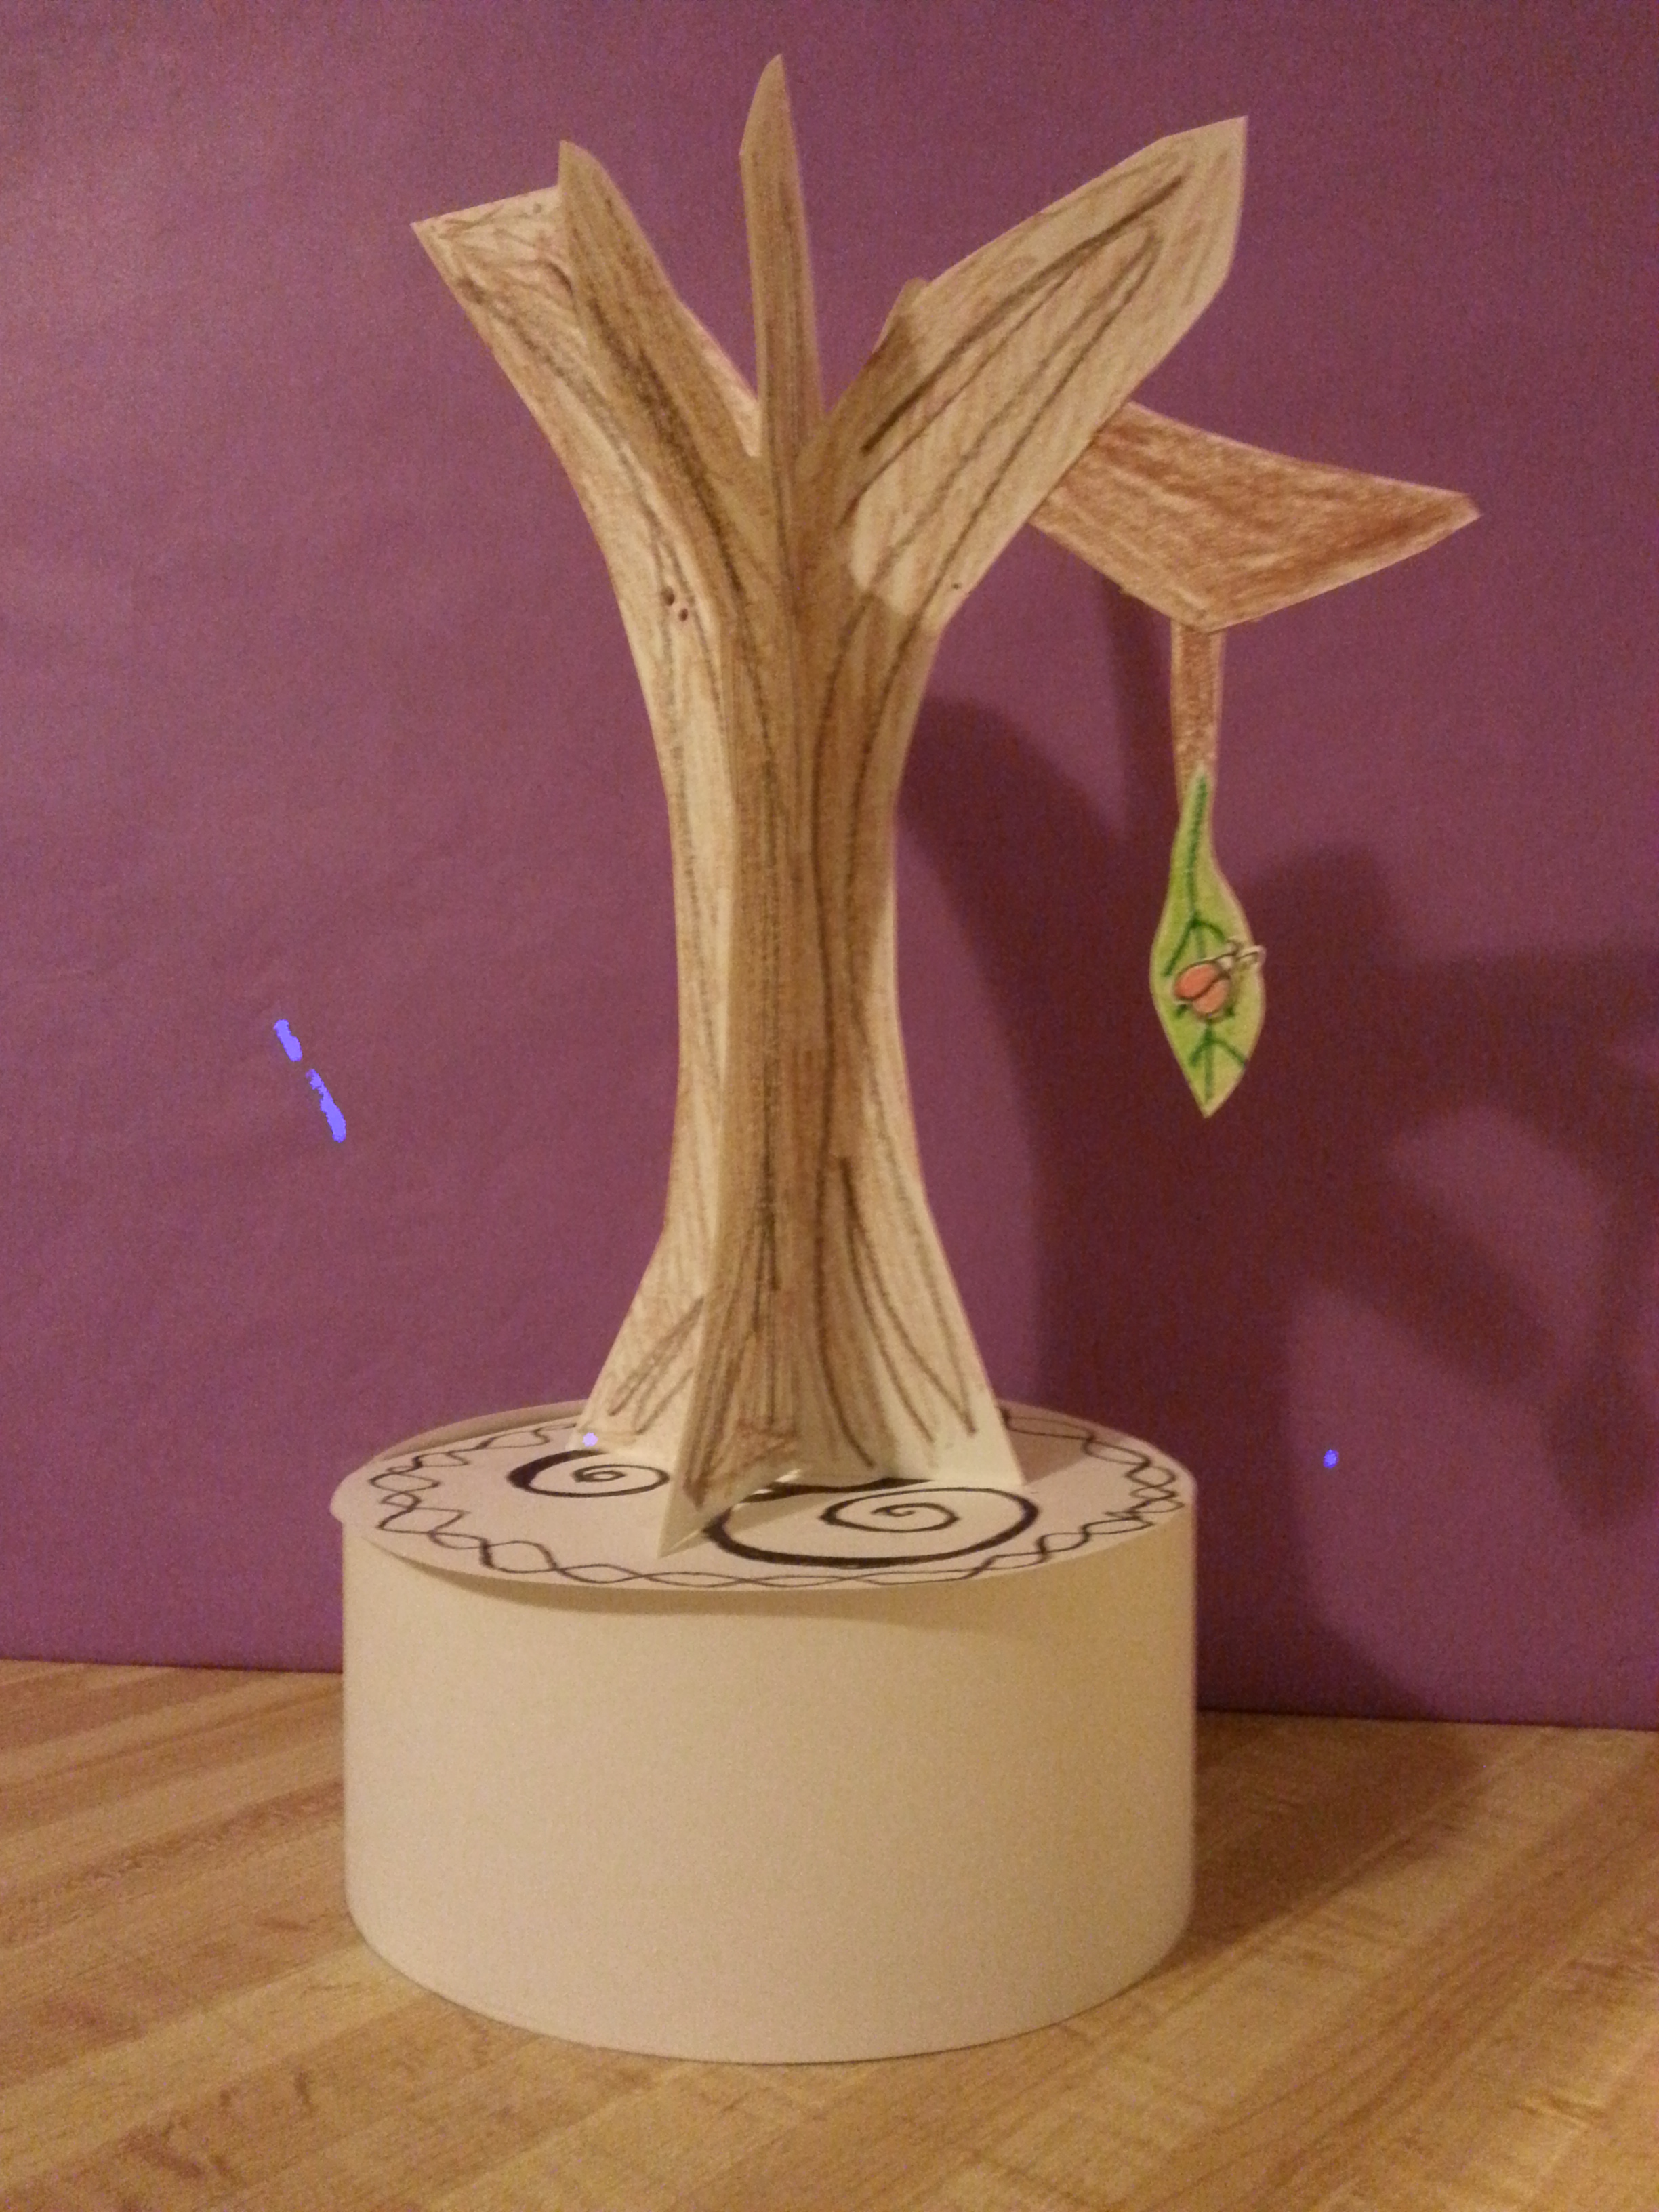
In this project, students create a 3-dimensional free-standing paper sculpture of the scene described through the many verses of the traditional Irish song O’ro the Rattlin’ Bog. The song, as well as this project, brings students the message that nothing is as simple as it seems at first glance… especially if you are moving fast (allegro). Within each person that you meet and each place that you go there is a whole world: with trees, limbs, branches, twigs, bugs and so on! If you move slowly (adagio), you will catch life’s glorious details! The base of the sculpture will be made to look like a traditional Irish bodhrán drum.
Vocabulary from the Musical Word Wall: bodhrán, adagio, allegro, tempo
Materials You Will Need:
- Heavy weight paper
- pencils
- color pencils
- crayons
- water color paints
- scissors
- glue
- stapler
- Musical Explorers CD or online audio
Process:
This project can be completed in three 35 minute sessions. Minimal prep time required.
Session One
Step 1: CLASS CONVERSATION
Review the concepts of tempo, adagio, and allegro with your students.
- When we listen to Harry sing O’ro the Rattlin’ Bog, there are slow parts and fast parts. These fast and slow parts make what is called the tempo! The fast parts are called allegro, the slow parts are called adagio.
- Do you notice that during the chorus, we don’t get very many details about the scene, because everything is moving so fast?
- During the slow, adagio of the verse, we get more details about what the scene looks like.
With your students, make a list of everything they know about the bog (there’s a tree, a limb, a branch, a leaf, etc.). Explain to your students that they will make a sculpture of the scene in the bog.
Step 2: Pass out the heavy weight paper, pencils, color pencils, crayons and scissors. Ask students to draw two tree trunks.

After drawing the trunks, cut slits in each trunk as shown in the picture below.
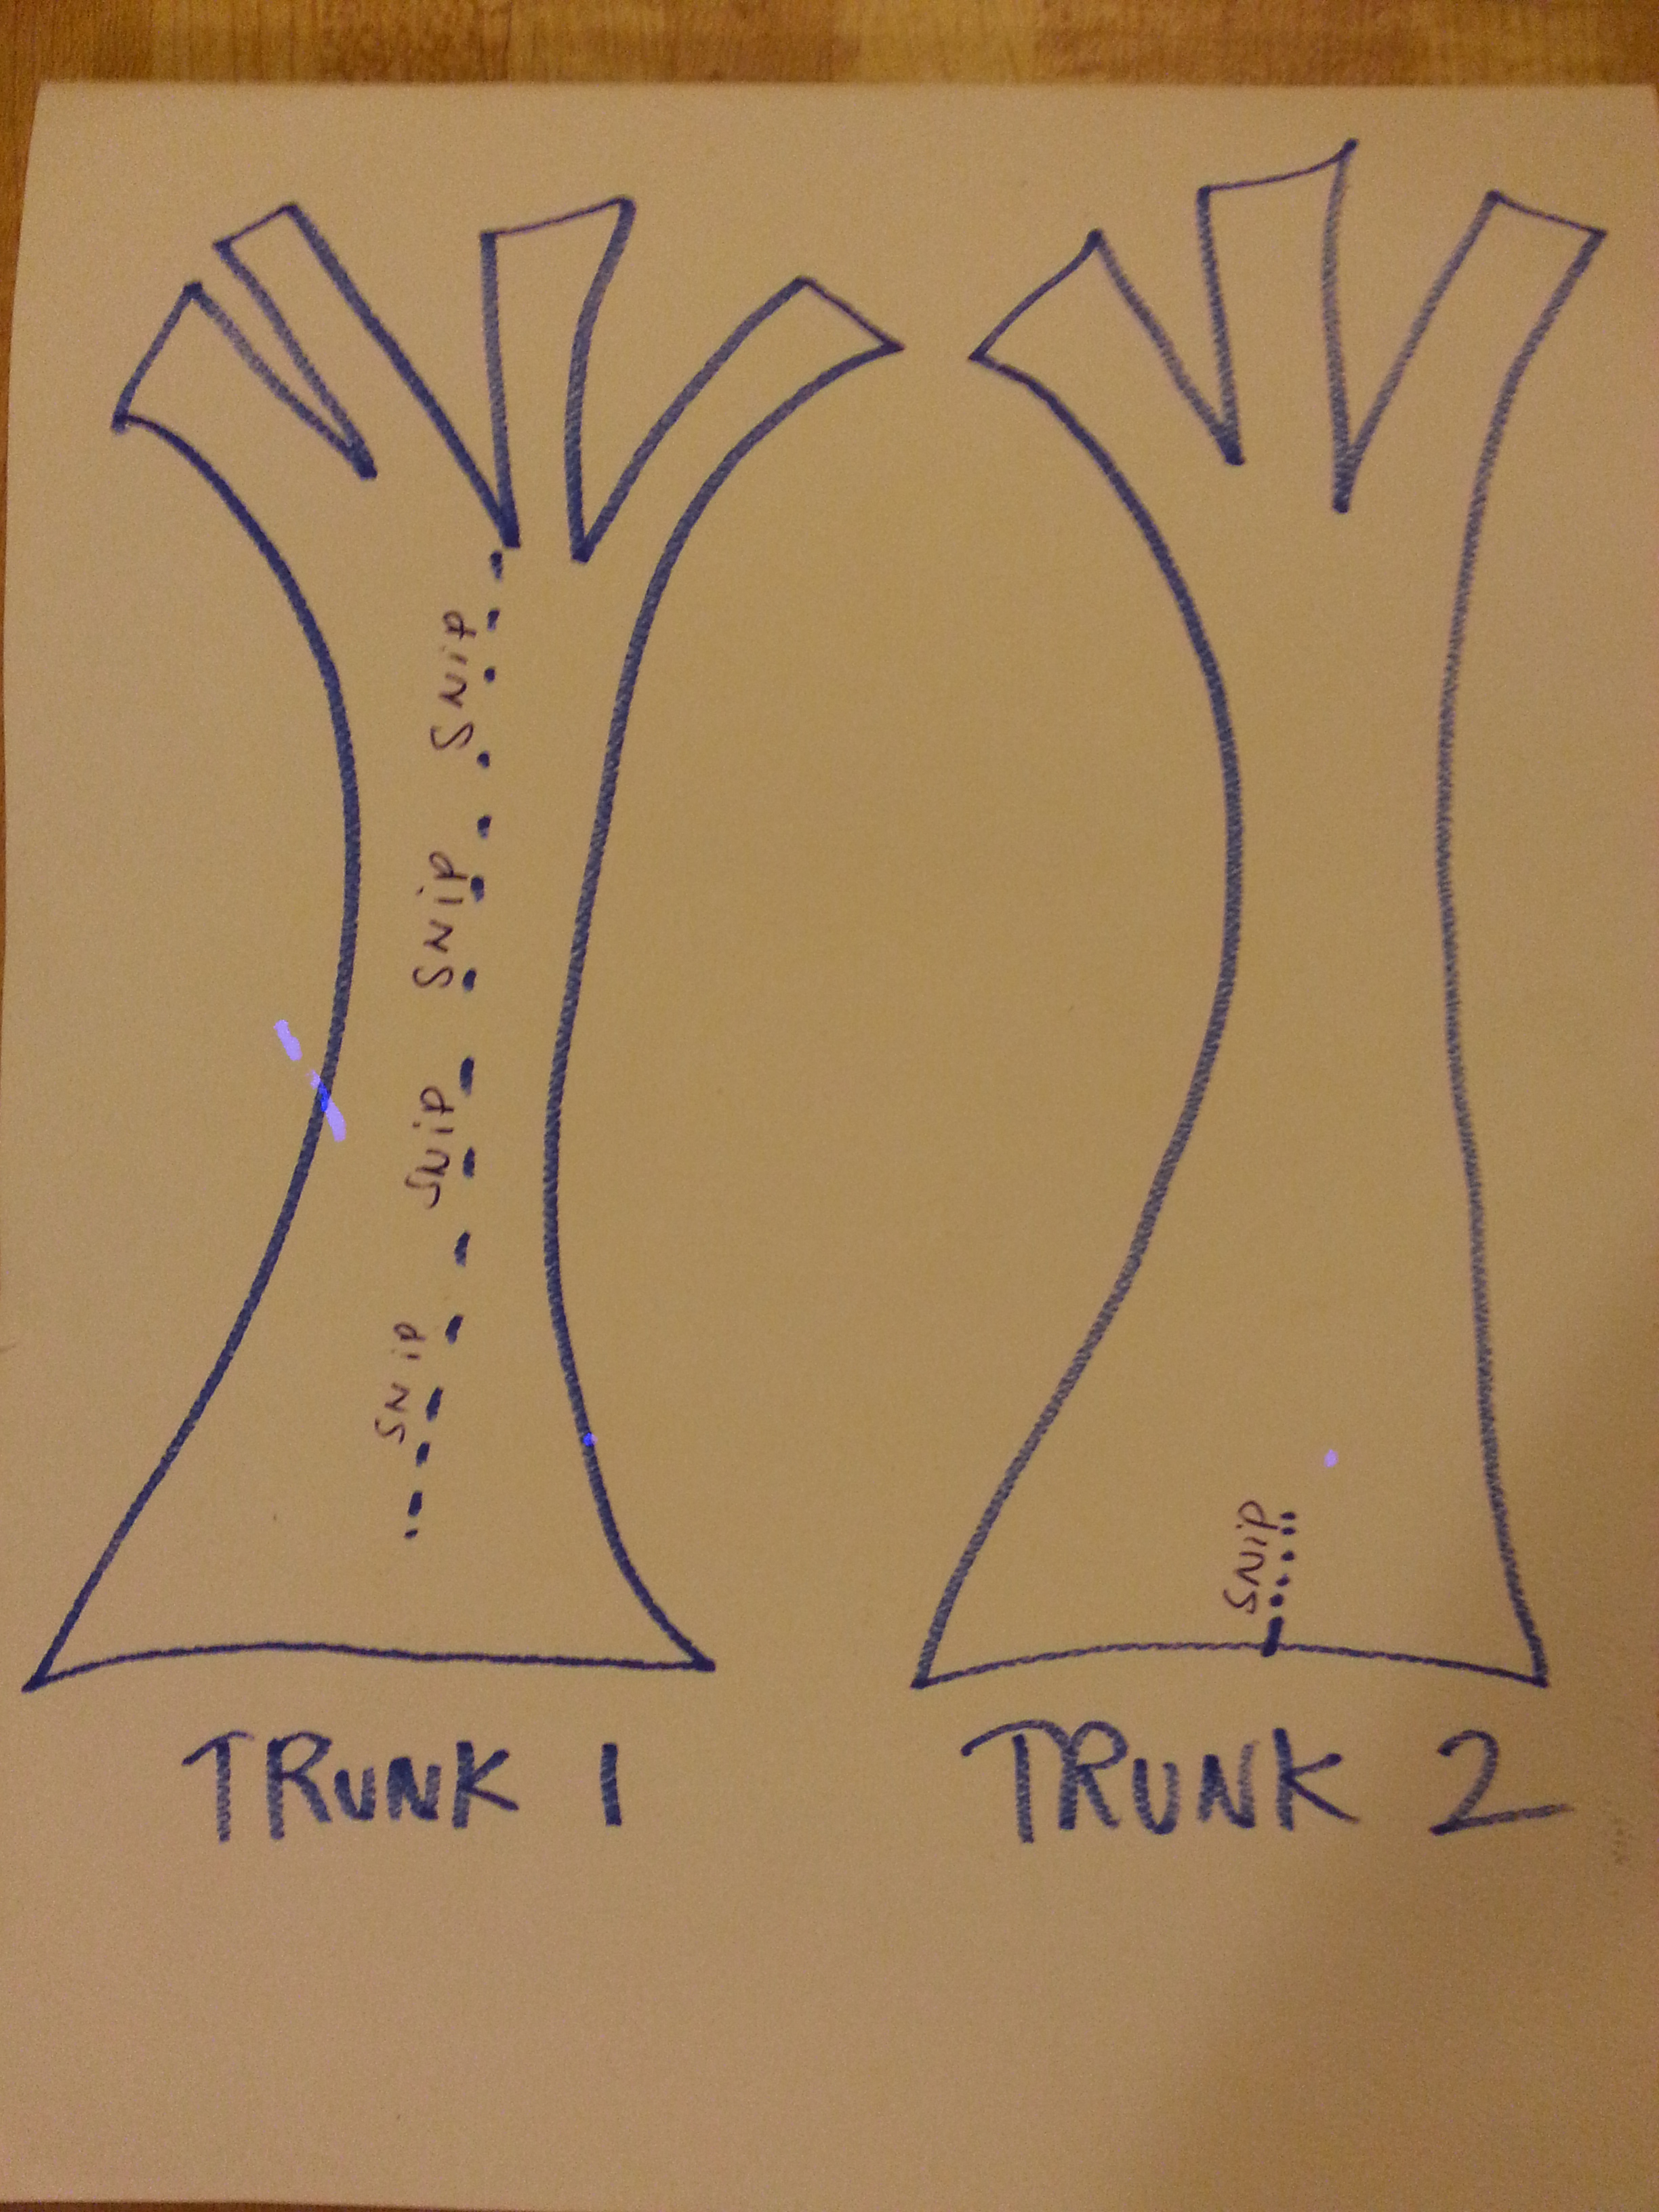
Help students slide the two trunks together, as shown in the image below and secure with clear tape. The tree should stand up by itself.

Encourage students to create all of the pieces described in the song, by drawing them and and cutting them out of paper.

Session Two
Step 1: Give students time to finish coloring and attach all the parts to their tree.
Session Three:
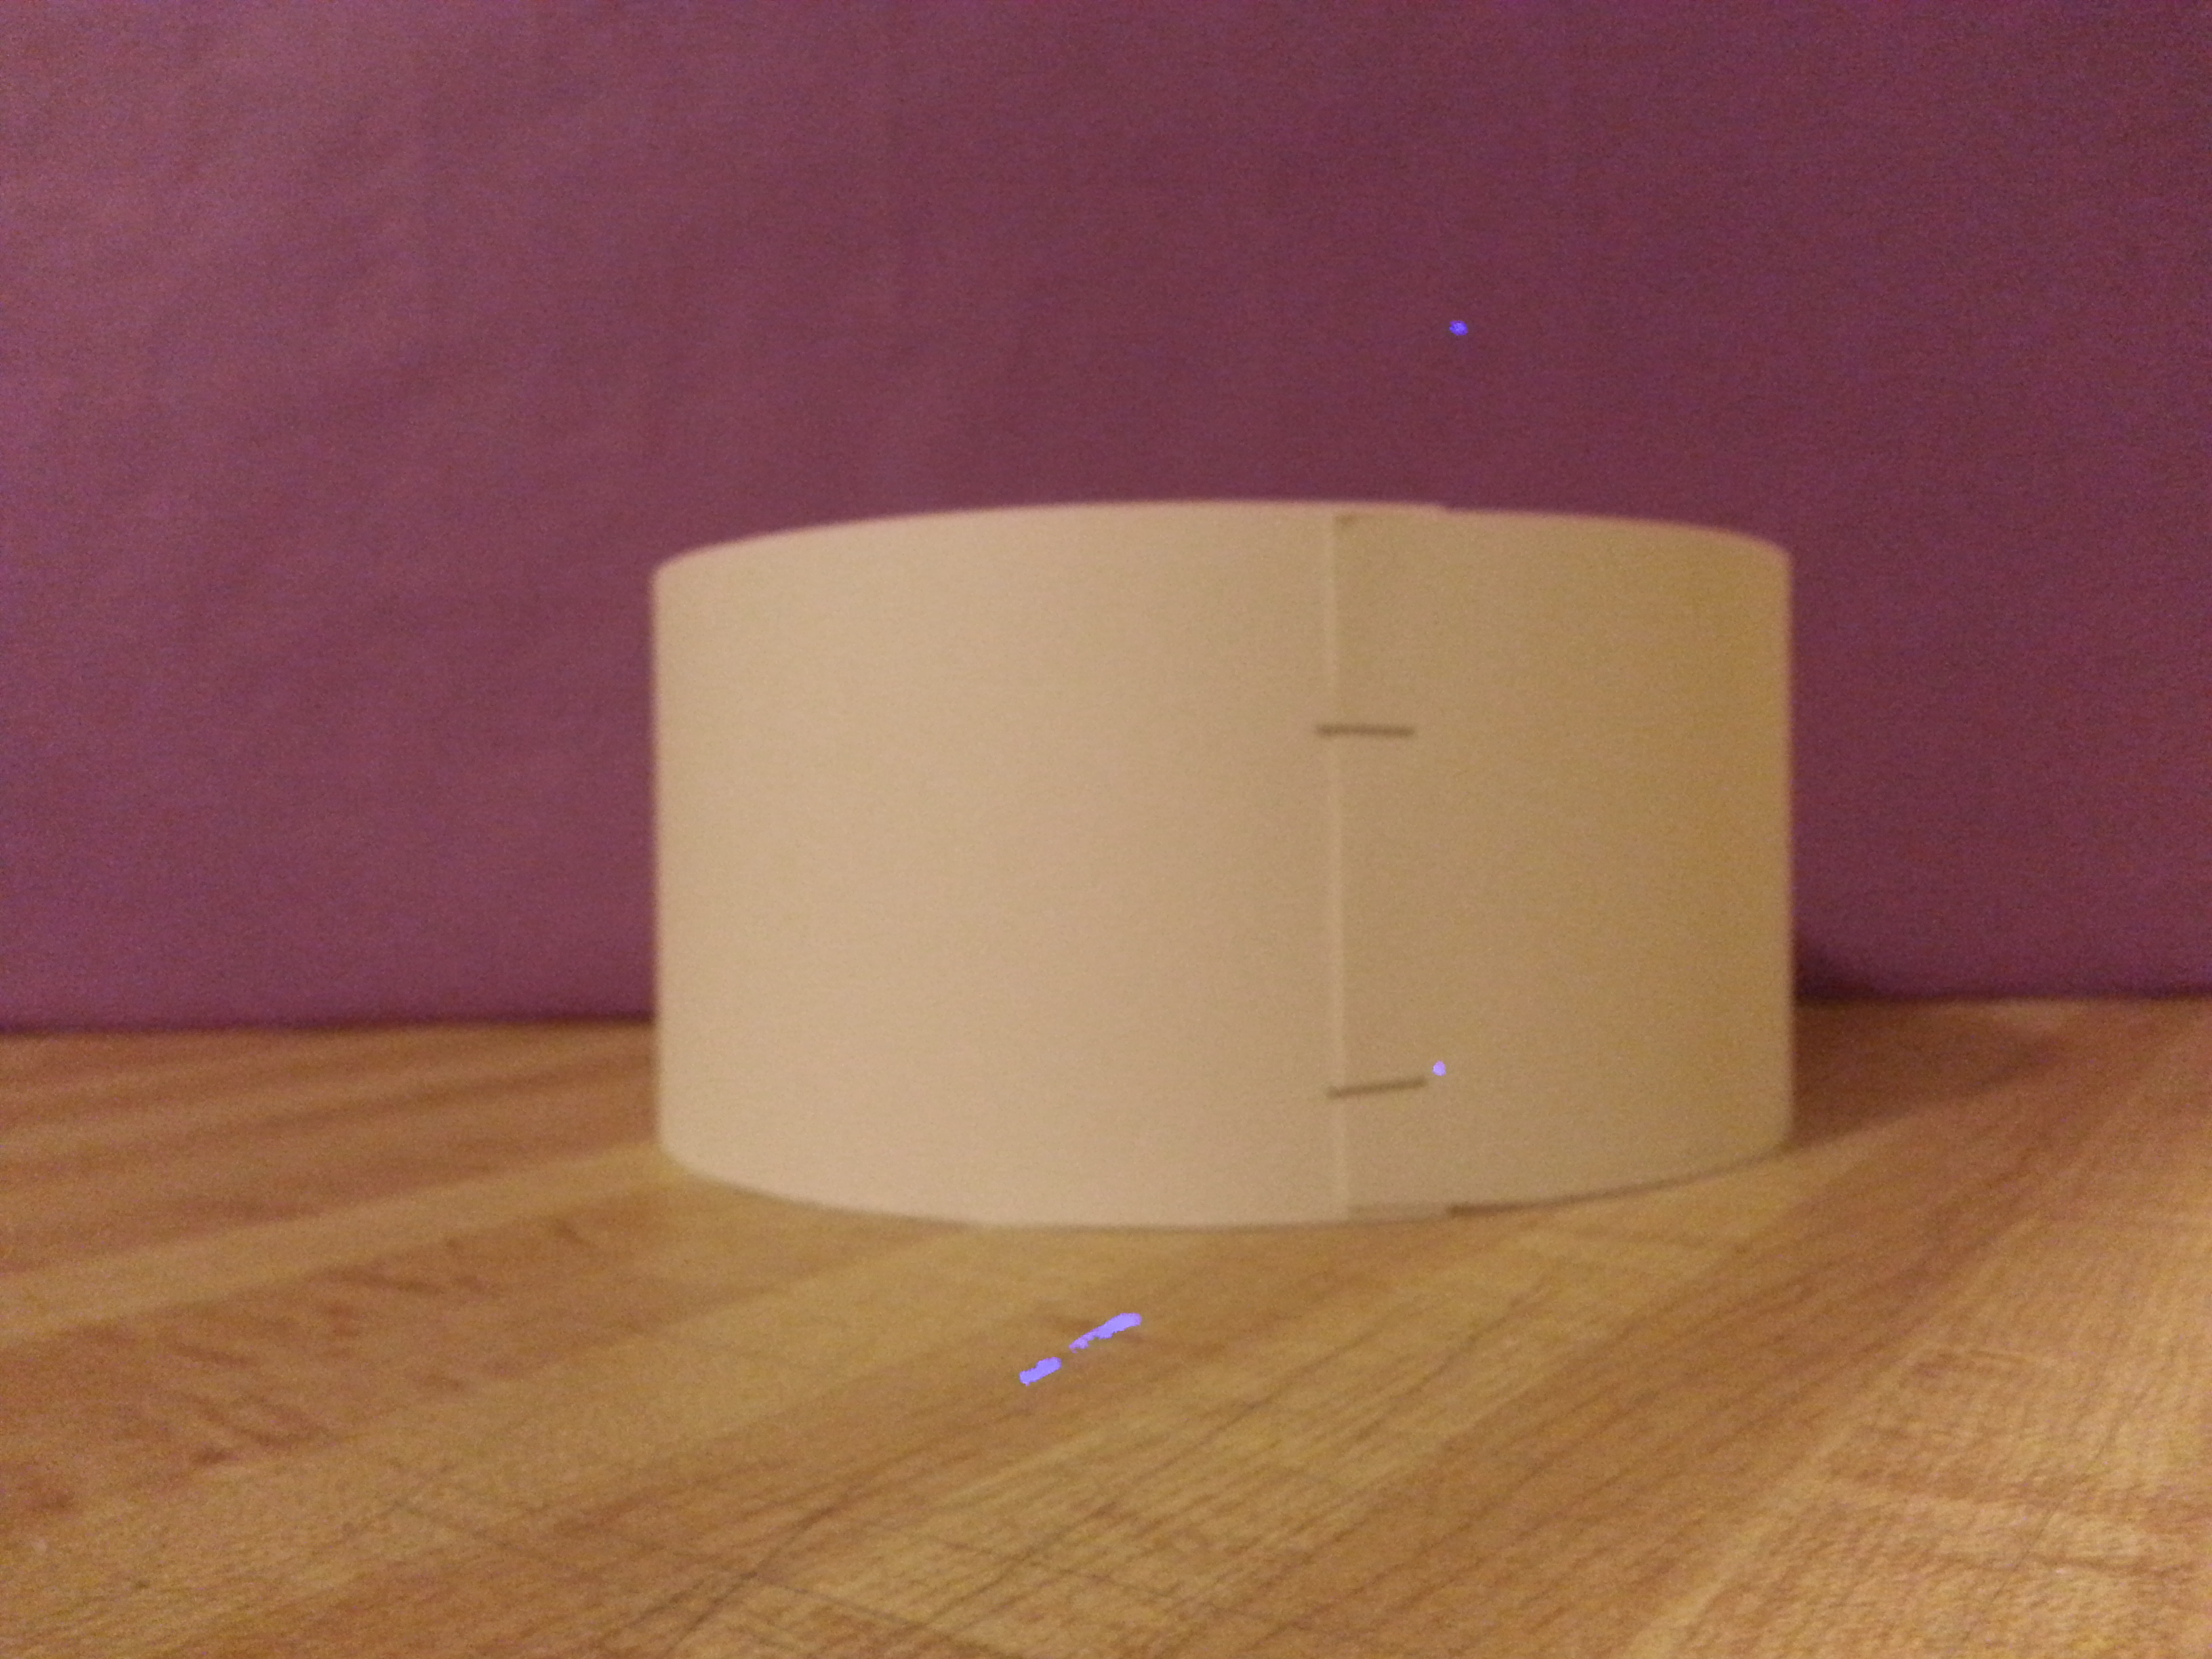
Step 1 (Prep): Pre-cut circles for each of your students, using the heavy weight paper. Make the the circles 7.5” in diameter. These will be used for the top of the drum sculpture. Pre-cut 24 x 3” strips out of the heavy weight paper, these will be used for the sides of the drum. Bend each strip into a cylinder and staple it together.
Step 2: CLASS CONVERSATION
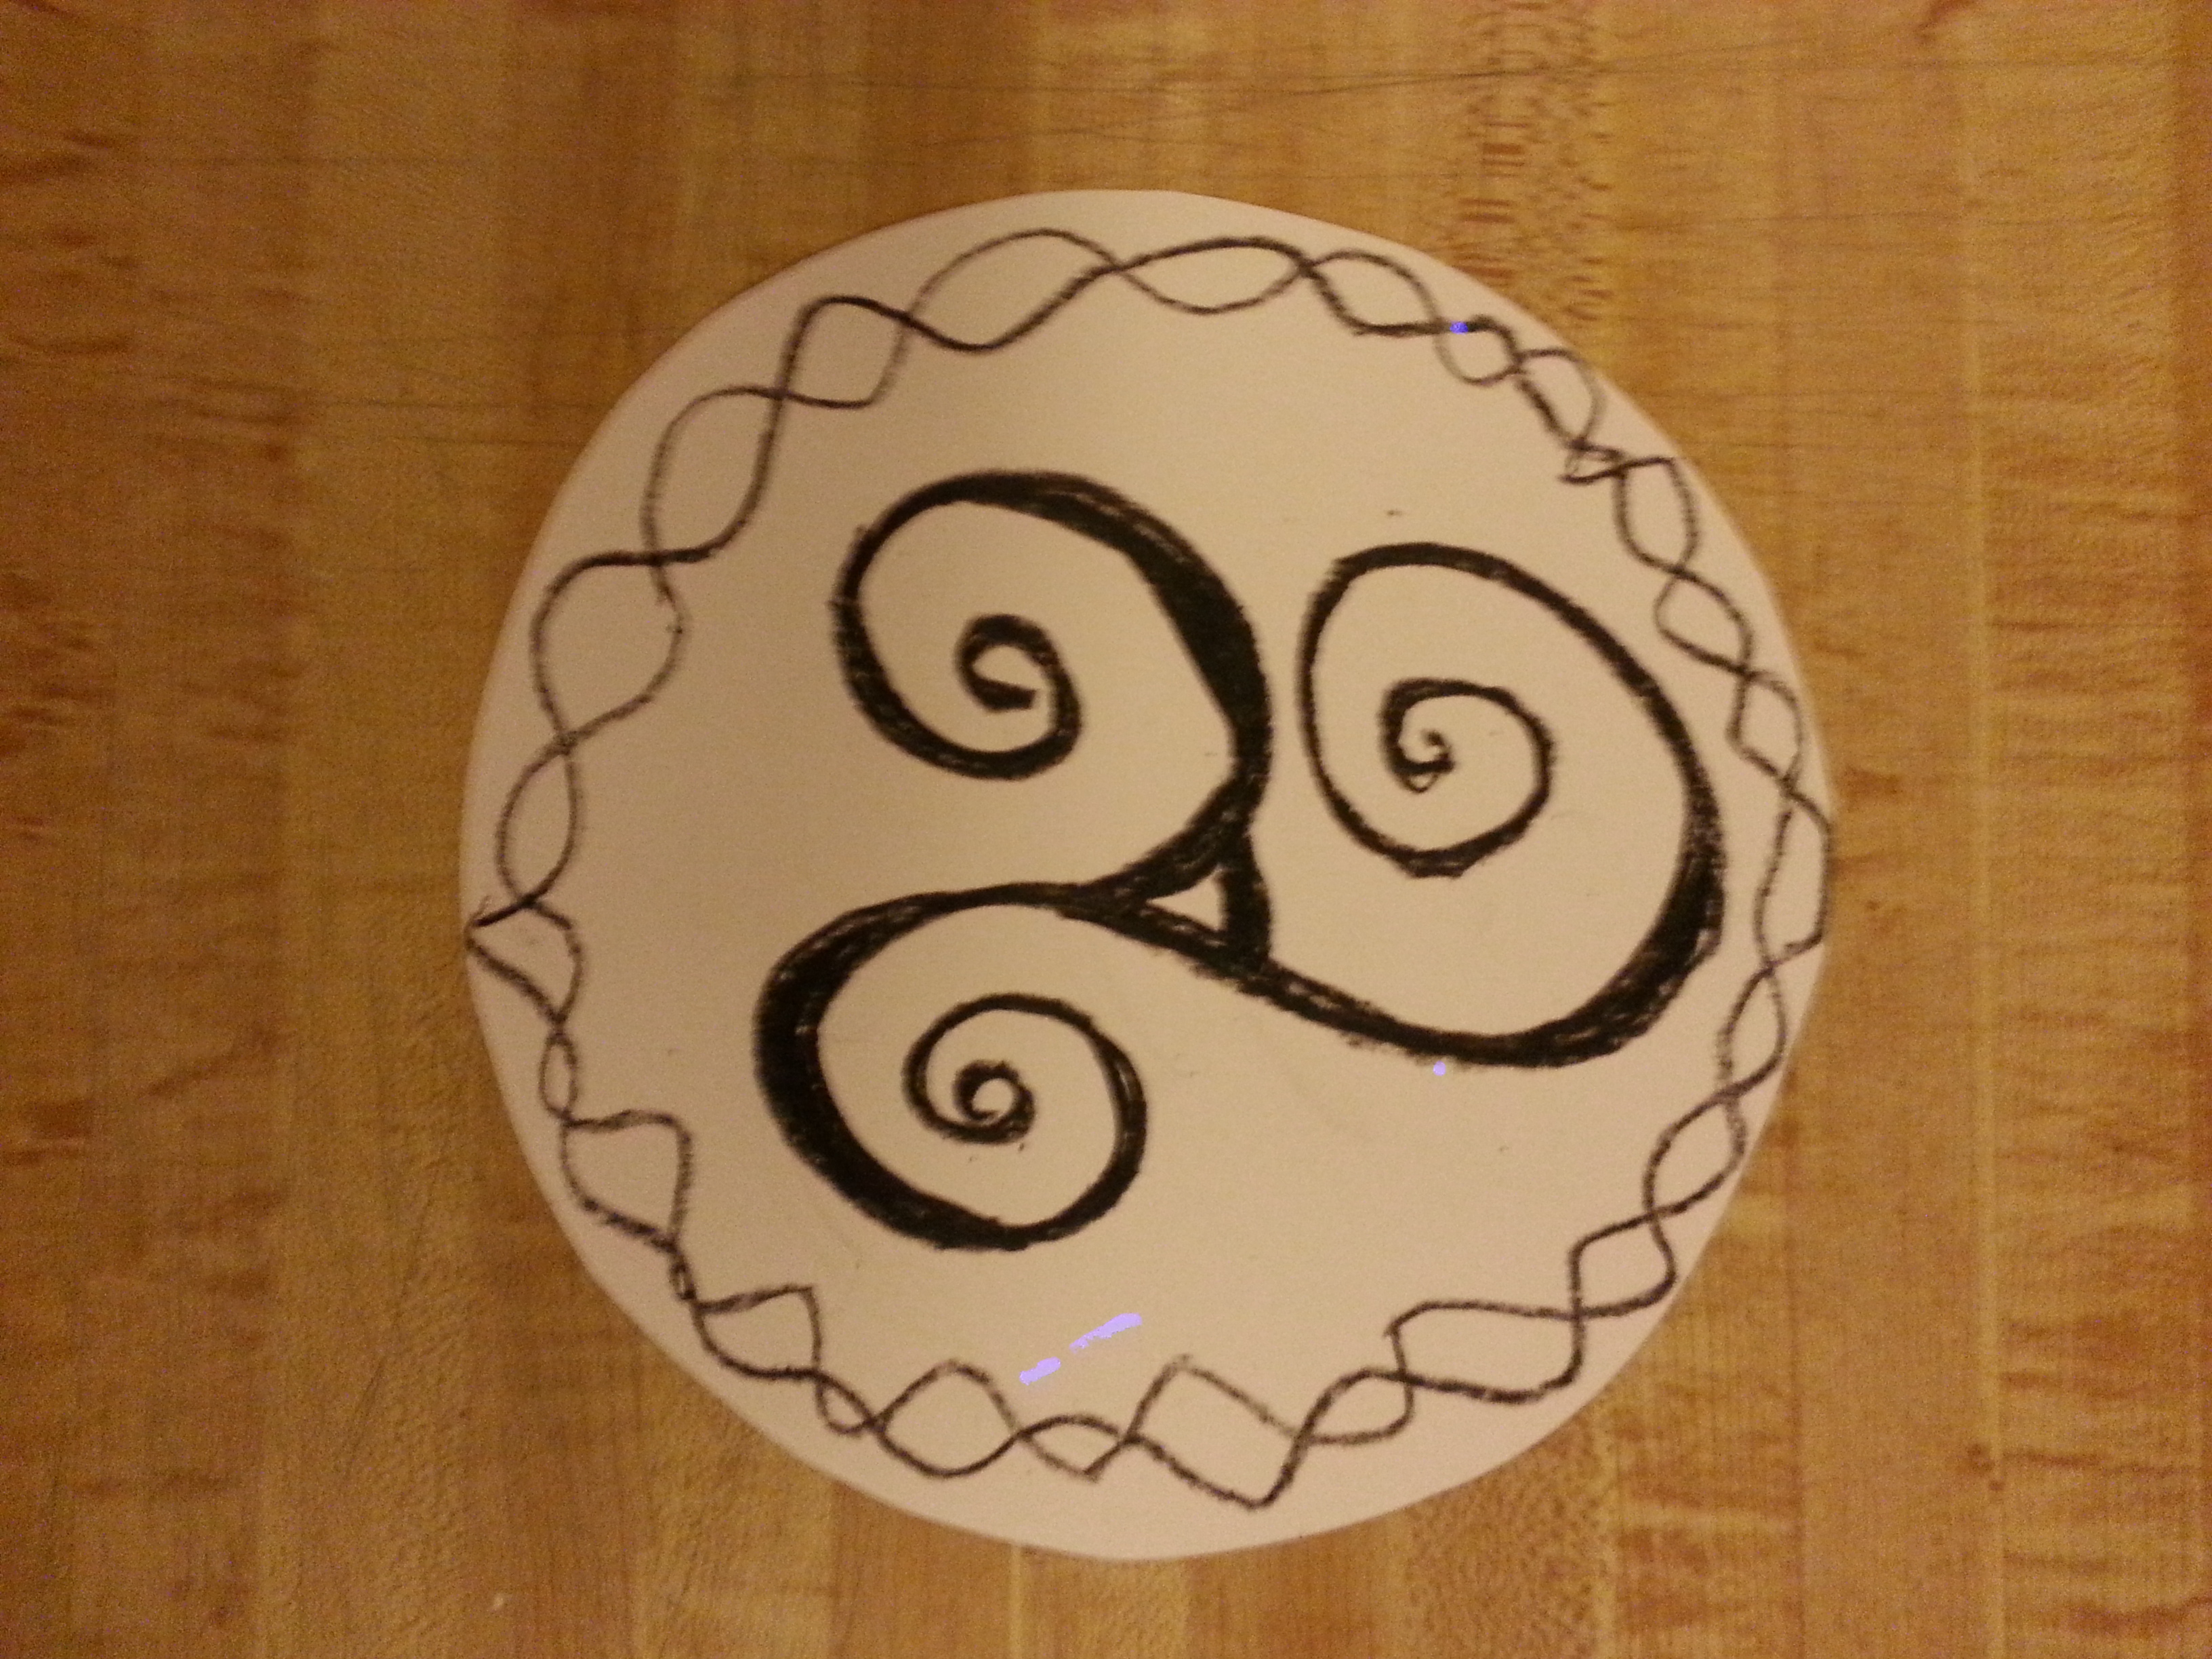
Review the bodhrán with your students, and explain to your students that they will be creating their own sculpture of a bodhrán, which will be the base of their Rattlin’ Bog sculptures. Share traditional Irish/Celtic designs with your students.
> view Irish/Celtic designs slide show (download Power Point show)
Step 3: Pass out pre-cut circles for the top of the drum as well as pencils, color pencils and crayons. Play the included slide show on repeat for inspiration. Support your students in drawing their own design on their “drum top,” based on the traditional Irish designs in the slide show.
Step 4: As each student completes their drum top, pass out the pre-made cylinders and some glue. Help your students assemble their drum and then add their tree scene on top of the drum. This completes the Rattlin’ Bog Sculpture Project!