Introduction
Welcome to Musical Explorers!
Musical Explorers is designed to connect students in grades K–2 to the musical community of the Georgia and South Carolina Lowcountry as they build fundamental music skills through listening, singing, and moving to songs from a wide variety of musical styles. In the coming year, you and your students will meet artists who represent different musical genres and cultural traditions. Together, you will learn songs and dances that you will perform along with the artists during culminating interactive concerts at the end of each semester.
The Musical Explorers curriculum encompasses skills-based and creative activities that can be integrated into both general and music classrooms. This digital curriculum includes lesson plans, background information about the artists and their featured musical styles, and additional resources for further learning and instruction. Downloadable Student Guide (SG) pages include hands-on activities, photographs, and illustrations that support active learning. In addition, the companion streaming audio includes songs from each unit and supporting learning tracks.
We thank you for joining our expedition and hope you enjoy the journey!
→ How to Use This Curriculum
→ Becoming Musical Explorers
→ Vocal and Body Warm-Ups
→ The Musical Explorers Song
How to Use This Curriculum
This digital Teacher Guide contains three units, each devoted to one of our Musical Explorers genres. Every unit contains two lessons, each focusing on a song; the lessons guide you through the process of learning the songs, as well as teaching relevant musical concepts and exploring the cultural context of each genre. There are multiple activities within each lesson; you can choose among them to best suit the needs of your classroom. The downloadable Student Guide (SG) pages are incorporated throughout the digital curriculum.
Additional features that can be found within each lesson include:
- Audio Tracks: Audio tracks can be accessed on Soundcloud, and are available online on each unit’s page.
- Videos and other online resources: Introductory videos for the artists and their music and other online resources can be found on each unit’s page. New this year are activity videos for each genre, led by teaching artist Shanna Lesniak, suitable for classroom or remote learning.
- Resources for Teachers: Each unit starts with a page of resources that provides background information about the musical genre and culture. Some of these resources are intended to be shared with students; others are for teachers who may want to explore further on their own.
- Creative Extensions: Creative extensions are designed to deepen the exploration of repertoire, culture, and musical concepts.
- Literacy Extensions: Each unit identifies picture books related to the artist’s music and culture that you can read with your students.
- Musical Word Wall: We encourage you to build a word wall and add vocabulary words as they are introduced in the lessons. A glossary of terms can be found here.
Options for Teachers of Students with Special Needs
- Students can participate in Musical Explorers in a variety of ways and may learn the songs by singing, moving, and/or clapping. You may also want to focus on smaller sections of the songs. Since you know your students best, allow them to participate in ways that will help them feel the most successful.
- Encourage students to engage with the music using tangible objects, such as handmade instruments (e.g., cups with beans for shakers), rhythm sticks, and drums.
- Allow time for students to experience the music and repeat as often as necessary. The lessons outlined in this curriculum may take additional time and span more than one class period. Use one-step directions and visuals as often as possible to help students understand the concepts.
- Some visual aids are provided within the curriculum and at the Musical Explorers concerts, but you may wish to provide additional resources to help your students engage with the material. If you have ideas for elements to include in future curricula, please send them to education@savannahmusicfestival.org.
Active Listening Tips
One of the goals of Musical Explorers is to develop habits of active and engaged listening. You can support your students on this journey by using the following strategies.
Make the Invisible Visible
Look for ways to make the invisible world of music visible and, whenever possible, kinesthetic. These methods include:
- counting, clapping, and tapping rhythms (body percussion)
- drawing or painting to music
- connecting the music to narrative ideas
- dancing and moving to music
- connecting cultural ideas with music
Ask Open-Ended Questions
Here are some general suggestions to inspire discussion as students encounter new songs and new sounds. We include additional scripted prompts in blue italics throughout the Teacher Guide as a starting point for further learning and exploration.
- What do you hear in this music?
- How would you move to this music?
- What words can you use to describe this music? For example, is it busy or calm, loud or soft, high or low, smooth or bumpy?
- How does this music make you feel?
- What do you think the musicians are feeling? What makes you think that?
- What are the instrumentalists doing? What is the singer doing?
Becoming Musical Explorers
In this introductory unit, you will find activities and warm-ups you can use throughout the semester. Start by introducing Melody on SG1 and the musical region on SG2 and SG3.
- Where is our state on this map?
- As we explore these regions, what kinds of music do you think we might find?
On SG4, SG5 and SG6, you will find three activities to use to engage students in discovering music in the world around them. These activities are designed to work individually—both inside the classroom and at home—and as classroom projects (e.g., taking a sound discovery walk or making DIY instruments out of found objects in your home or classroom).
- “Explore the Sounds of Our City,” SG4, gives your students an opportunity to act as musical detectives outside of the classroom, listening for sounds and music in their everyday lives and recording them in the “journal” provided.
- “Discover Music in Everyday Objects,” SG5, highlights common objects found at home or in the classroom that can be used to create DIY musical instruments. For example, a cardboard box can be strung with rubber bands of different sizes to create a string instrument; a set of drinking glasses filled with different amounts of water can be struck with a spoon or a chopstick to create a xylophone-like instrument; and two pot lids can be struck together like cymbals. Encourage your students to discover other objects that can yield interesting sounds.
- “Create a Postcard,” SG6, gives your students an opportunity to share what’s special about their neighborhoods as they are learning about each artist’s hometown and the geographic region associated with their music.
Literacy Extension: The Listening Walk 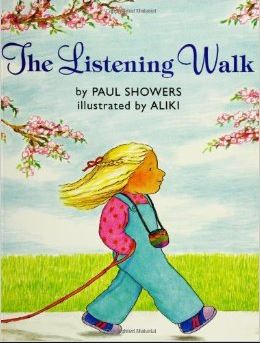
In Paul Showers’ The Listening Walk, get immersed in all the sounds around you as you join a girl walking her dog throughout the neighborhood. You may even hear sounds you wouldn’t expect!
Vocal and Body Warm-Ups
Start each lesson with warm-up activities in order to establish a routine that fosters healthy vocal technique, kinesthetic learning, and active listening. The following warm-ups are designed to work as a sequence but can also be used as standalone activities, depending on time, objective, and teacher preference.
Finding Your Breath
Smooth and Bouncy Breath: Breathing is the basis for all the ways we use our voice.
- Using both hands, have students create an “O” shape by touching pointer finger to pointer finger and thumb to thumb.
- Instruct them to put the “O” around their belly button and take slow, silent, and deep breaths, pushing the “O” out in a smooth motion as they exhale while keeping their shoulders still.
- Add a “sh” or “th” sound to the breath.
- Next, try to bounce the “O” in short motions. Add a “sh,” “th,” or “t” sound to the breath.
- What is different or the same when you add different letter sounds while you exhale?
- What is happening inside your body as you breathe?
- Is anything moving? What is moving?
Vocal Warm-Ups
In the following exercises, students will practice healthy singing technique by exploring posture, diction, and the full range of their voices.
Sirens: Students will explore the full range of their voices by pretending they are police cars on a chase with their sirens on.
- Model the vocal contour of the siren (going from a low pitch to a high pitch and back down again), while matching the vocal shape with your hand and arms.
- Ask students to echo you so that they can begin to feel and understand the difference between high and low pitches by using their bodies and voices.
- Once students are comfortable, choose a student leader to “conduct” the sirens with his or her body.
Tongue Twisters: Tongue twisters are a fun way to warm up the lips, teeth, and tongue—our articulation tools. This will help encourage proper diction, making words easier to understand when singing.
-
- Here are some examples of tongue twisters:
- Chester cheetah ate a chunk of cheap cheddar cheese.
- Mommy made me mash my M&Ms.
- Daddy made me dump them down the drain.
- Ask the class to say a tongue twister slowly at first, and then try to speed up.
- Once the students are comfortable, have them sing the tongue twister on one pitch, starting on middle C and ascending by half steps.
- Once they are comfortable singing the tongue twister try varying it. For example:
- Have the class try and sound like one voice as the tongue twister speeds up.
- Change the beginning consonant in the tongue twister.
- Have students write their own tongue twisters.
- Here are some examples of tongue twisters:
A Posture Song: Proper posture helps keep the breath connected to the voice when singing. When a body is hunched, the air gets stuck.
-
- Students perform the movements described in the lyrics of “Feet, Feet Flat on the Floor” as they sing.

Hoot Owl: Students will warm up their head and chest voices while exploring vocal range and legato singing. Head voice often refers to the upper vocal register and can be described as light, floating, and open. Exploring chest voice can help students easily find their head voices.
- Have students place a hand in the middle of their chest (between their sternum and collarbone) and say “huh” in a deep voice. This should produce vibrations in the chest. Explain that this is their chest voice.
- Next, ask students to hoot like an owl. They should no longer feel the chest vibration. Explain that this is their head voice.
- Using their owl (head) voice only, ask students to sing the exercise “Hoot Owl” starting on middle C and ascending by half step to F (or as high as your class can continue while maintaining healthy singing).

Explore Different Voices: Lead a discussion with the class about the four different ways they can use their voices—whispering, talking, calling, and singing.
-
- Where would we use our whispering voice? (e.g., library or movie theater)
- Where would we use our talking voice? (e.g., classroom, telephone, or dinner table)
- Where would we use our calling voice? (e.g., baseball game, playing sports, or leading a group)
- Where would we use our singing voice? (e.g., Musical Explorers concert, car, or shower)
- Have students explore each vocal quality by using the same sentence and pretending they are in some of the places identified above. (e.g., “Hi, my name is …”)
Body Warm-Ups
Put Breath, Sound, and Imagination Together: Using the following prompts, guide students through The Apple Tree vocal warm-up.
The Apple Tree: Have students imagine they are picking apples.
-
- Look up to the ceiling and imagine a big apple tree.
- Stretch your right hand up and pick the most beautiful apple you can find.
- Clean your apple on your shirt using your breath. Use short, low breaths with a “huh” sound.
- Take a huge bite, and make biting and chewing sounds—the more obnoxious the better.
- Tell me how delicious the apple is by making “mmm” sounds. The higher the sound, the more delicious the apple is!
- Swallow the apple with a gulping sound.
- Look at the apple and exclaim, “Ewww (on a vocal siren from high to low), there’s a worm!”
- Throw the apple and shake your body out to rid yourself of the gross idea of eating a worm.
- Repeat the warm-up with the left hand.
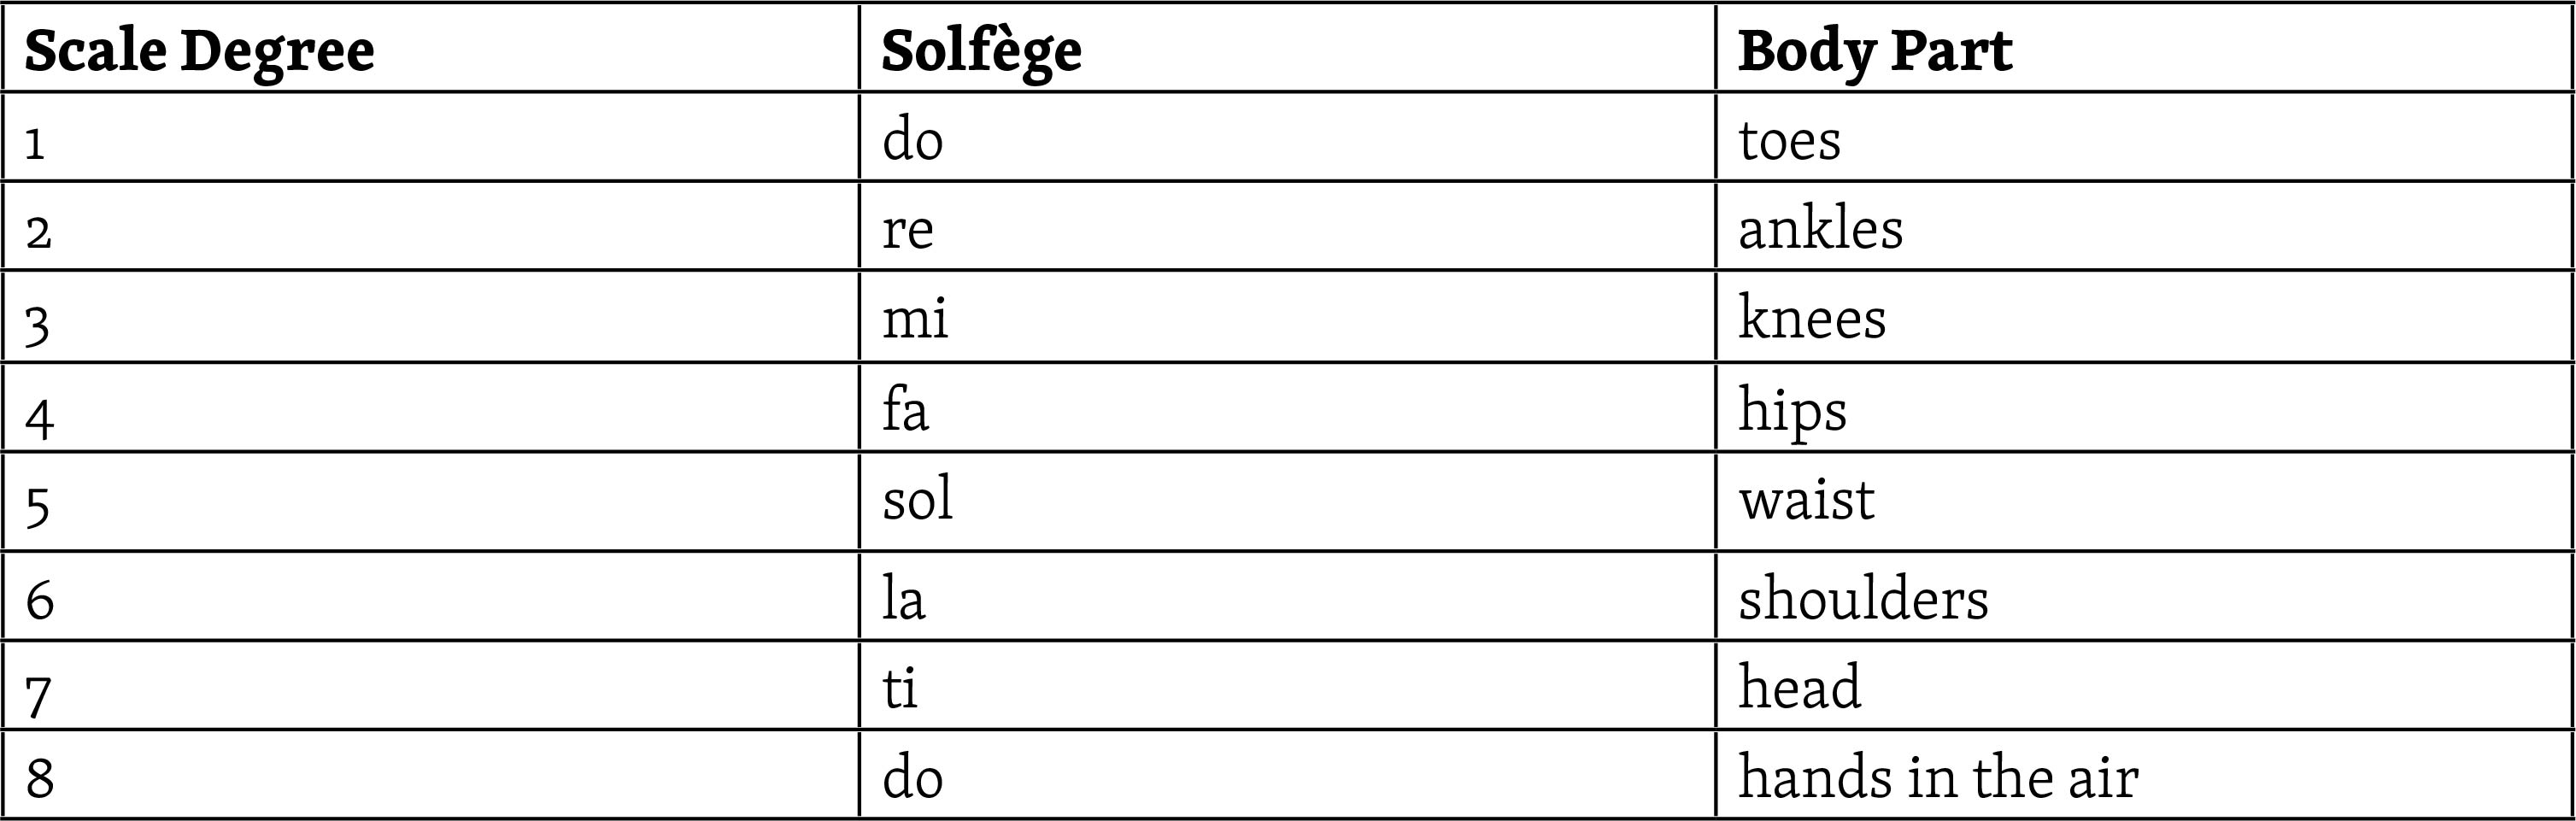
Explore Scales and Melodic Contour
- Have students sing the notes of a major scale while touching the corresponding points on their bodies indicated below. This scale can be sung using scale degrees, solfège, or the names of the corresponding body part.
- Reverse the scale direction, starting from the top and going down the scale.
- You can also try this out with different scales, including minor and pentatonic scales.
Explore Rhythm and Feel the Beat: Have students count to four in a repeated pattern.
- As they count, have them step in place on beats 1 and 3, maintaining a steady beat.
- As they keep the beat with their feet, have students repeat each phrase of “The Beat Is in My Feet” after you.
The Beat Is in My Feet: Lead students through different rhythms.

- While the students continue to keep the steady beat with their feet, create simple rhythmic patterns with your hands (e.g., chest patting, clapping, snapping, etc.). Ask the students to echo them back to you.
- Continue to explore other kinds of body percussion (e.g., hissing, clucking, etc.).
- As the students become comfortable with the warm-up, ask for volunteers to act as the leader, creating their own rhythms for the class to echo back.
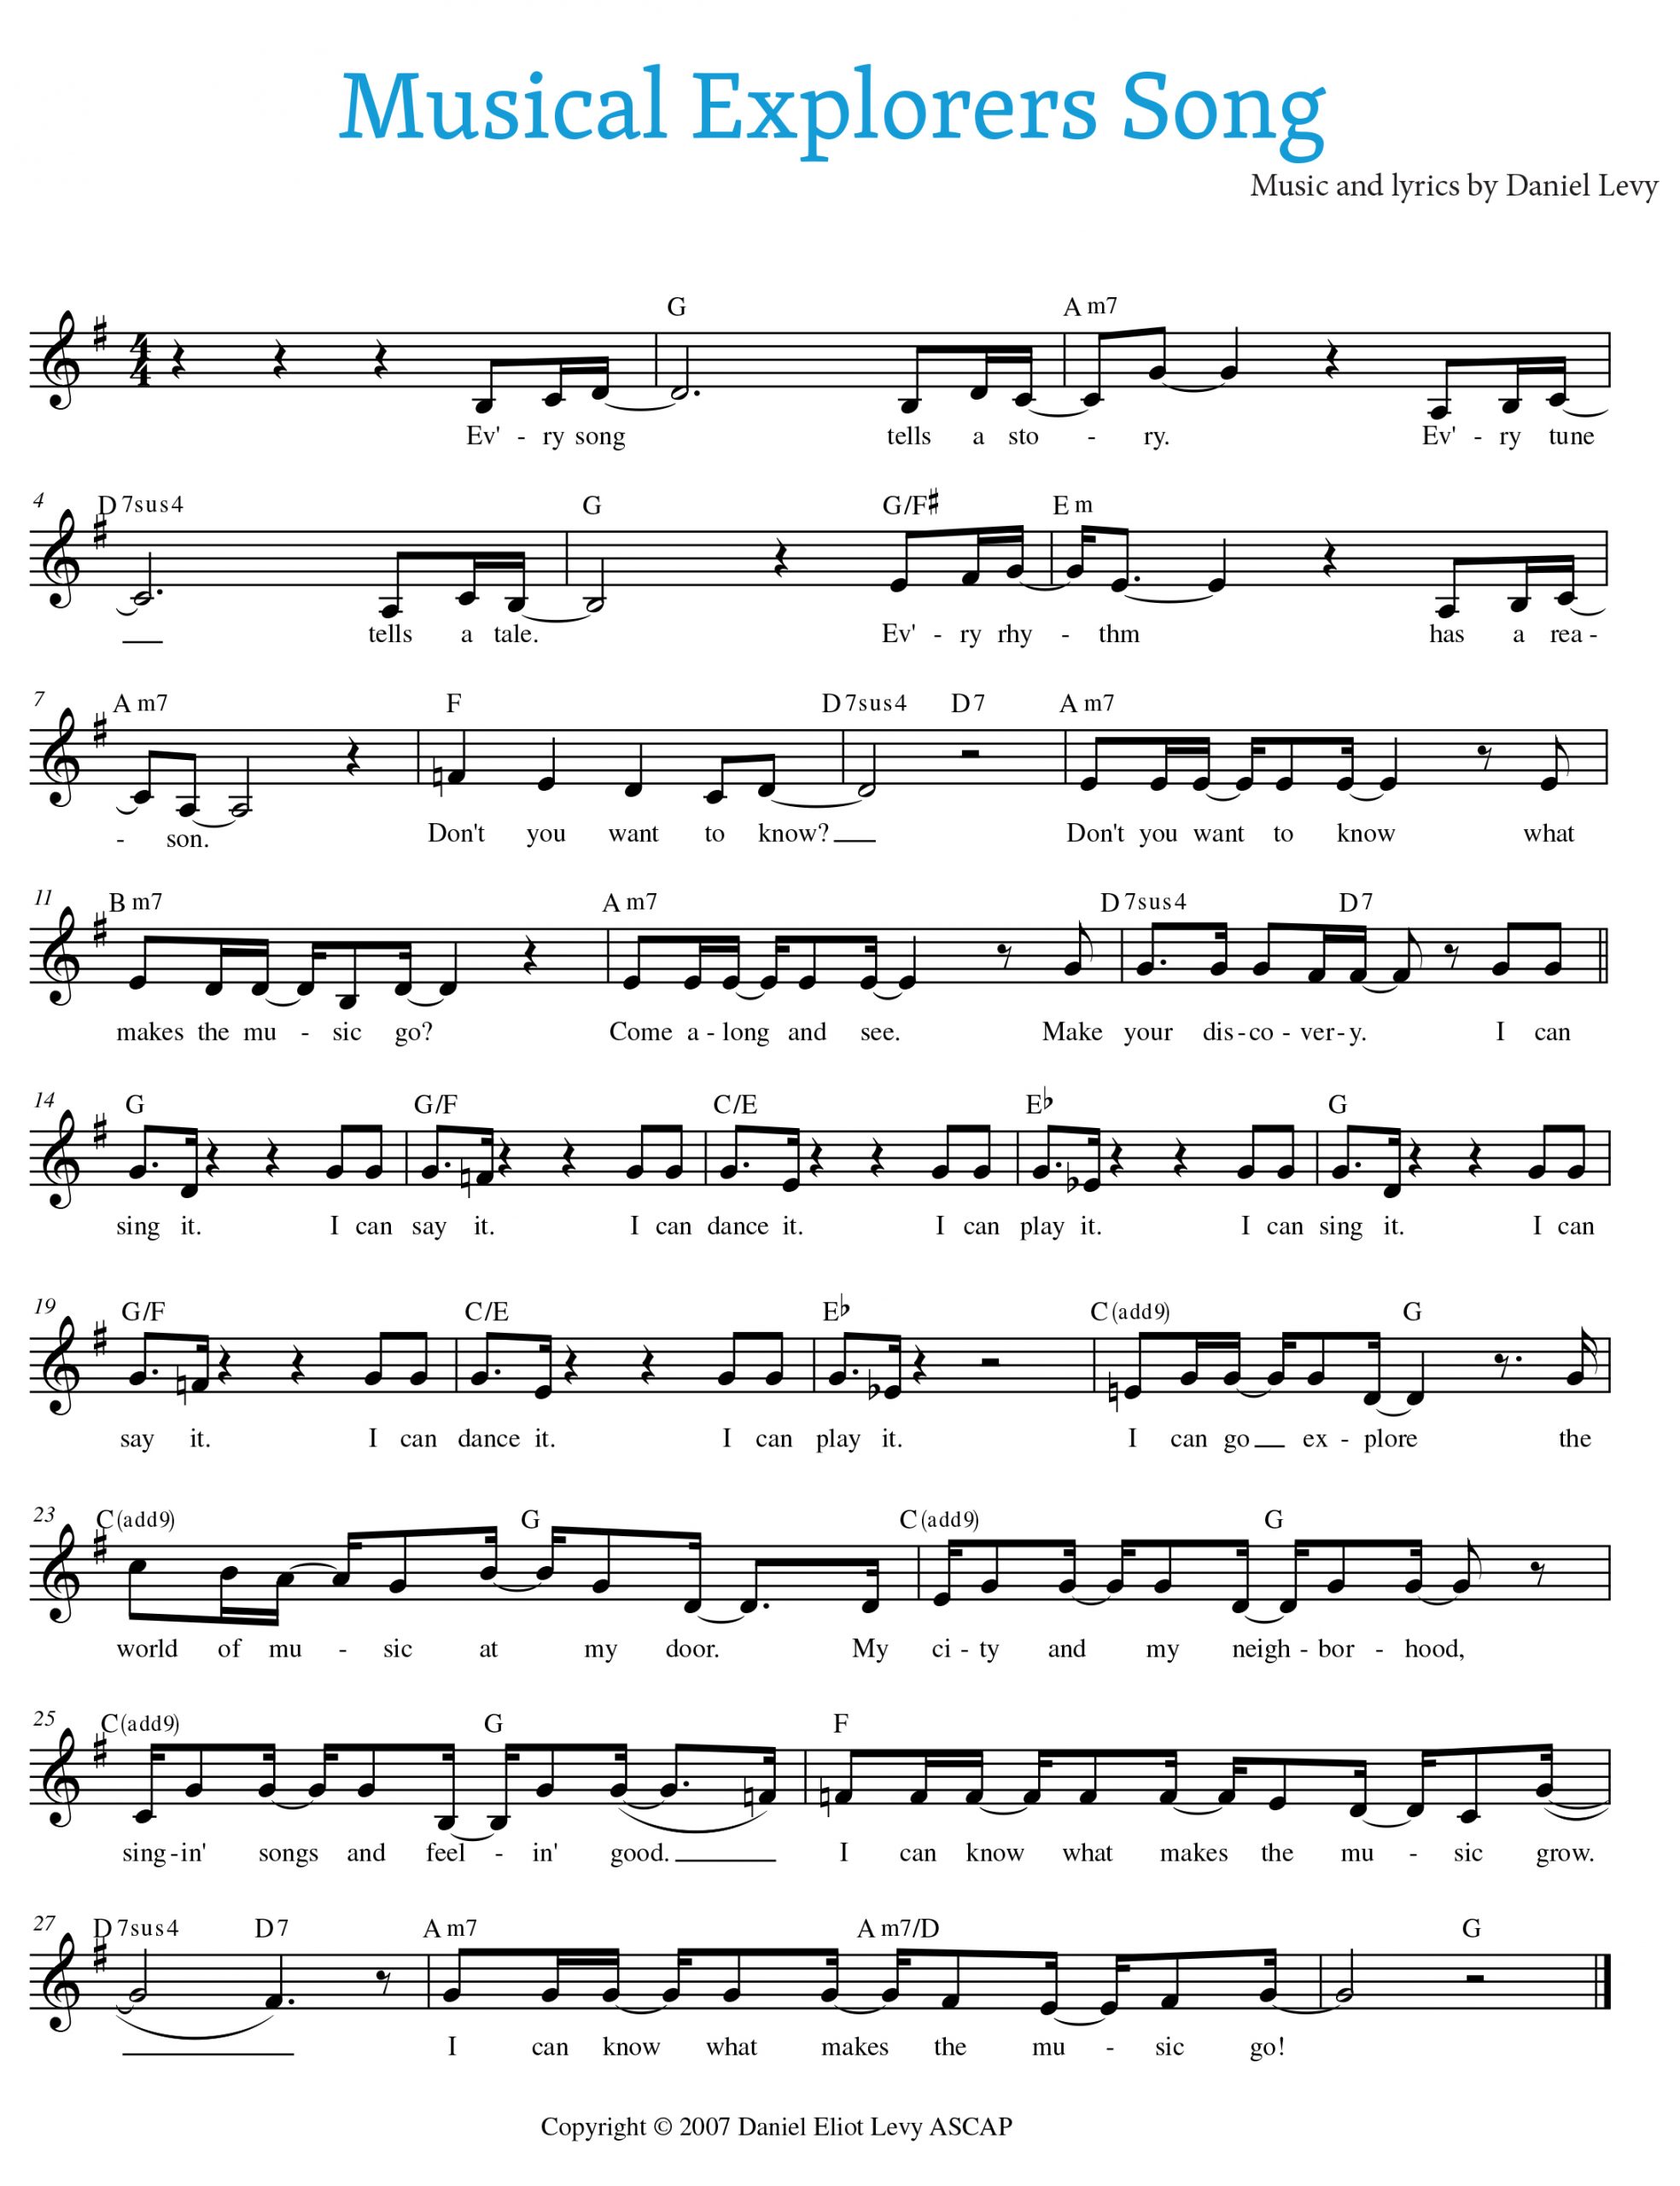
The Musical Explorers Song
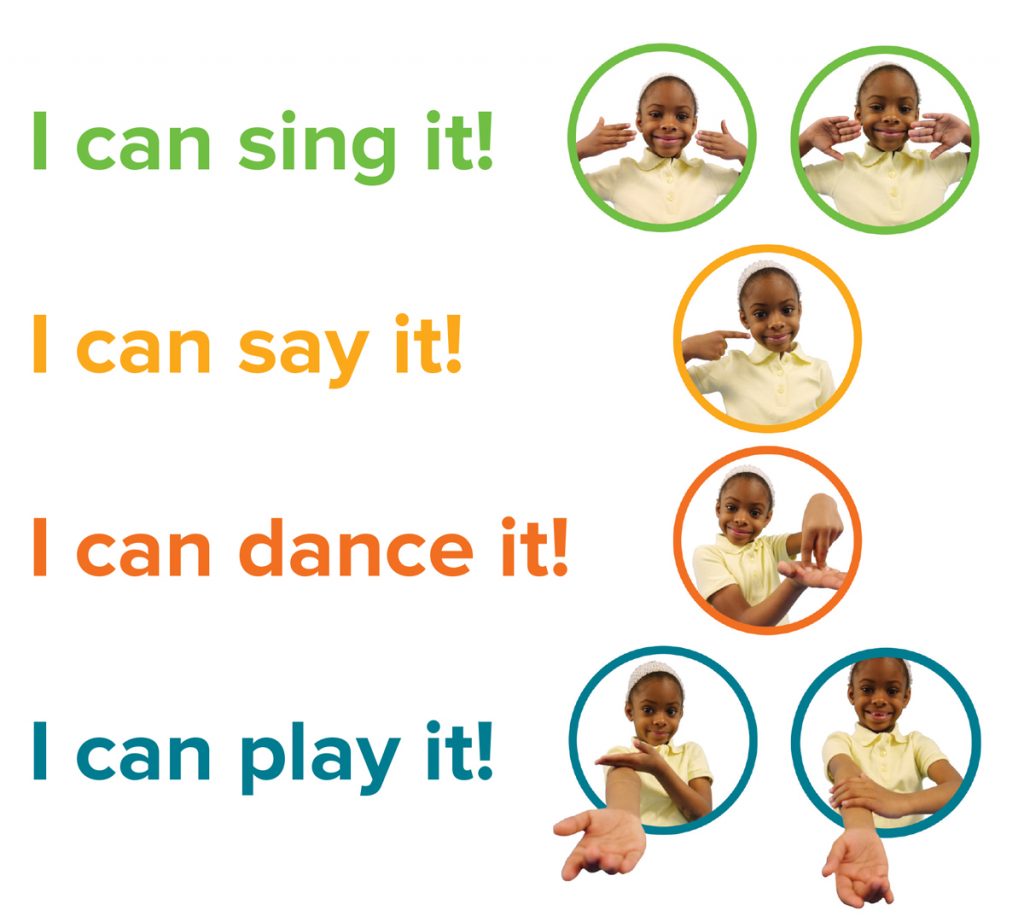
The Musical Explorers theme song is sung at the beginning and end of every Musical Explorers concert. Your students will learn to sing the song, and can also learn the accompanying sign language on SG7. This song can become a staple in your warm-up routine.